Quick Start Guide
Welcome to NappAI! In this guide, we will take you by the hand to build your first automation: a simple chatbot that answers your questions using Google’s AI.
What You Will Build
You will create a flow with four essential components (nodes) that receive your question, process it with an AI, and return an answer through a chat interface.
Prerequisites
To follow this tutorial, you will only need:
- A NappAI account.
- A Google Generative AI API Key. You can get one for free here.
Building Your First Project
Step 1: Create an Empty Project
Let’s start from a blank canvas to understand each piece.
-
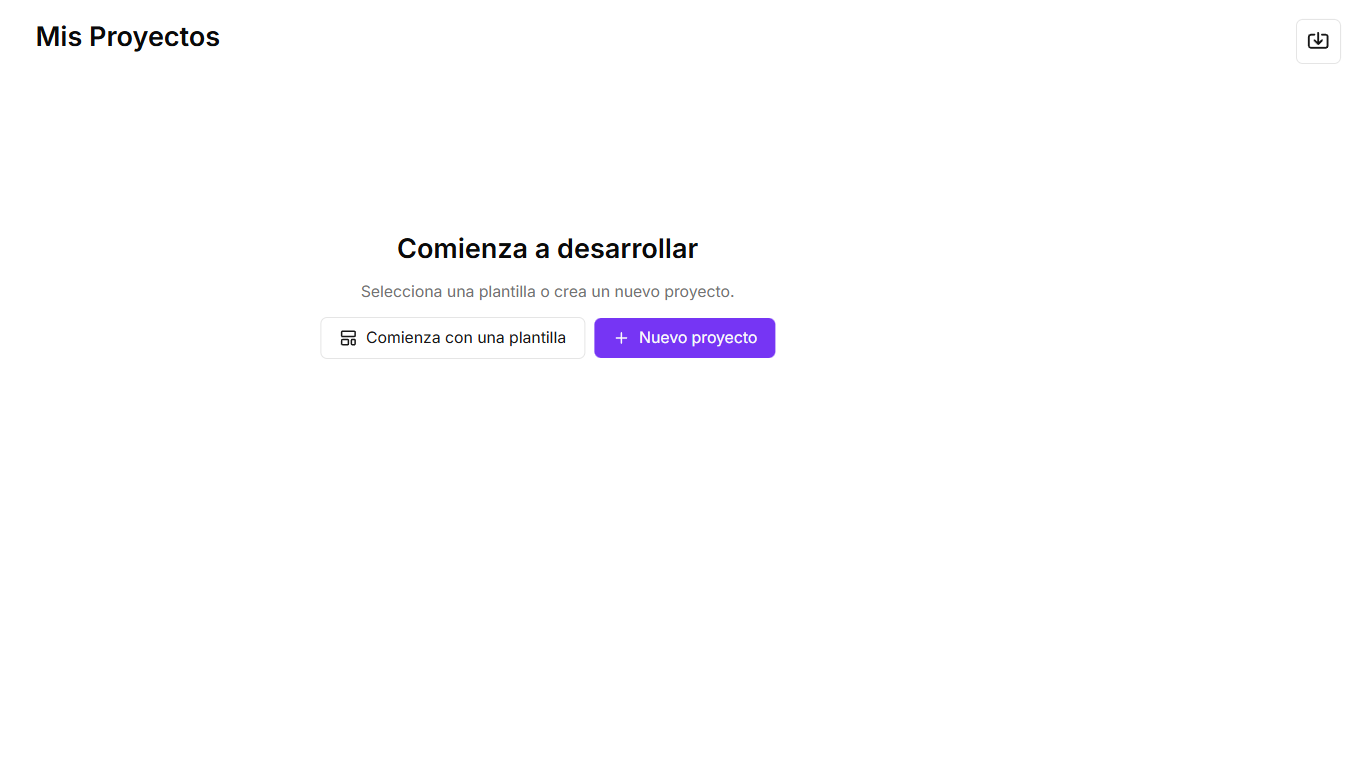
On the main dashboard, click + New Project.
-
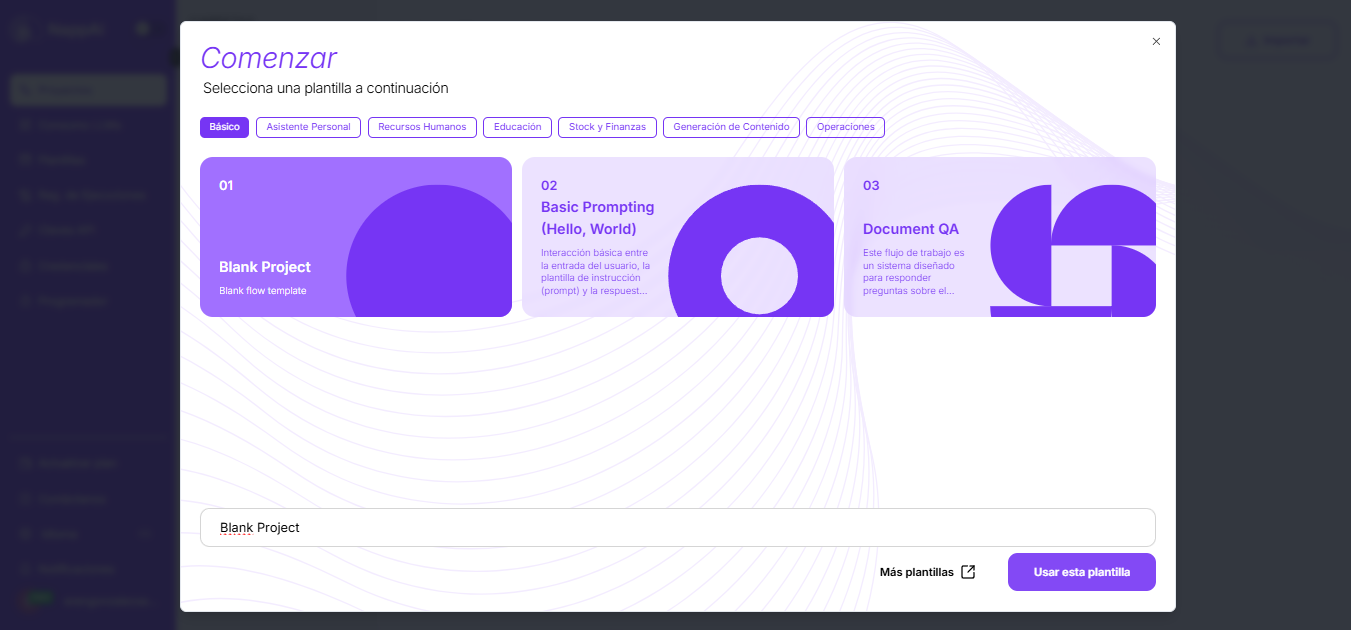
Select the Empty Project template and then click Use this template.
-
Perfect! You are now in the project view. Click Add your first component to get started.

Step 2: Add Components to the Flow
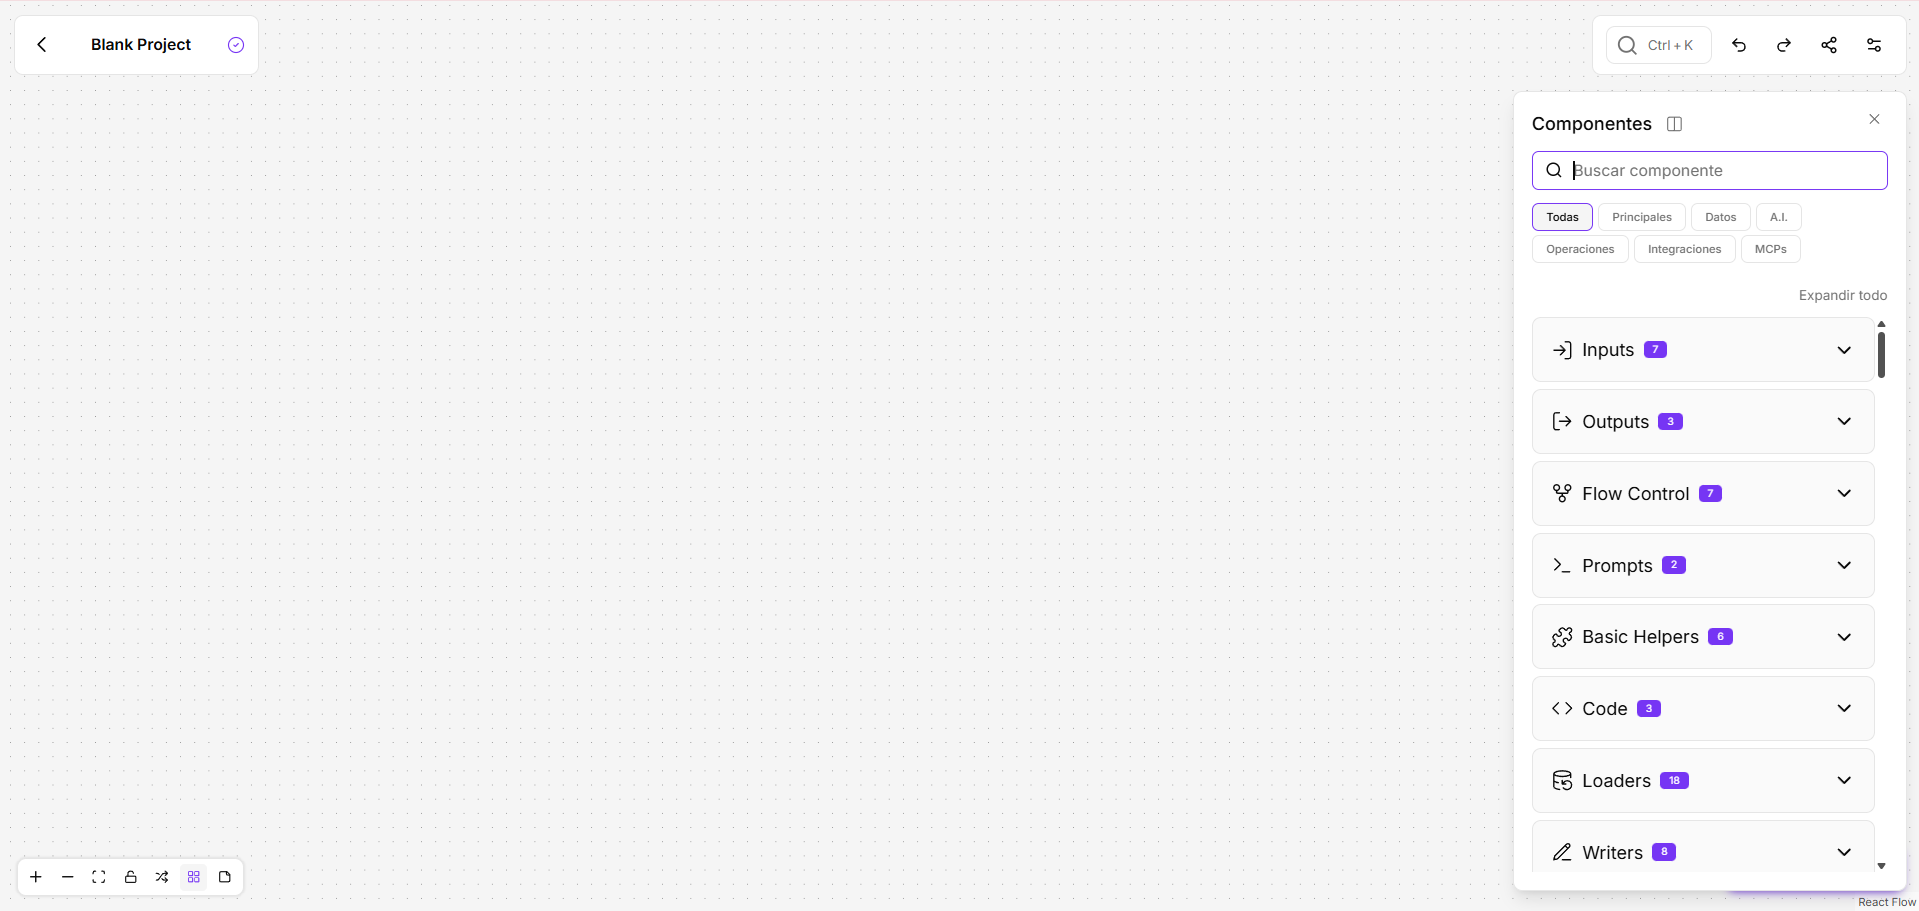
Now let’s add the “bricks” of our automation. In NappAI, components are organized into categories so you can easily find what you need: Core, AI Nodes, Databases, etc.
For this intelligent flow, we need the following components:
- Chat Input: Receives messages from the user.
- Agent: Acts as the “director” of the operation, coordinating logic and tool usage.
- Gemini: Google’s AI model, which will function as the “brain” the agent uses.
- Chat Output: Displays the final response in the interface.
To add them, simply find them in the menu on the right and drag them one by one to the workspace.
Step 3: Connect the Components
Connecting to an Agent is special. There is a main data flow and a connection for the model.
- Connect the main flow: Click the output point of
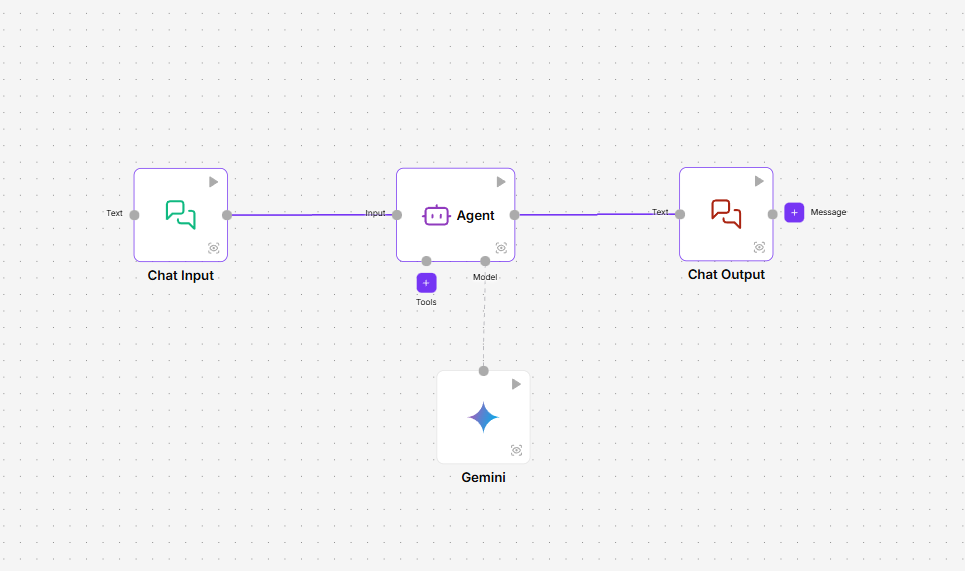
Chat Inputand drag it to theInputentry of theAgent. Then, connect theTextoutput of theAgentto the input of theChat Output. - Connect the Model to the Agent: Click the output point of the
Geminicomponent and drag it to the input point calledModelat the bottom of theAgent.
Your final flow should look exactly like this:
Step 4: Configure the Components
Now, let’s give instructions to each component. Click on each one to open its settings.
-
Chat Input: Needs no configuration. Easy!
-
Gemini: This is where you set up access to the AI model.
- Click
Create Newcredential. - Add a name for the credential.
- Paste your Google API Key obtained in the prerequisites.
- Once the credential is added, select the model (e.g., gemini-2.0-flash).
- Click
-
Agent: This is where the magic happens! This is the main configuration.
- Agent Name: You can give it a descriptive name, like
ReactAgent. - System Prompt: This is the agent’s brain. Define its personality and main task. Paste the following text:
You are a helpful and creative assistant. Answer the user's question clearly and concisely.User Question (input: {{aporte}})
Important: Note that the variable for user input here is
{{aporte}}. The Agent receives information through this variable.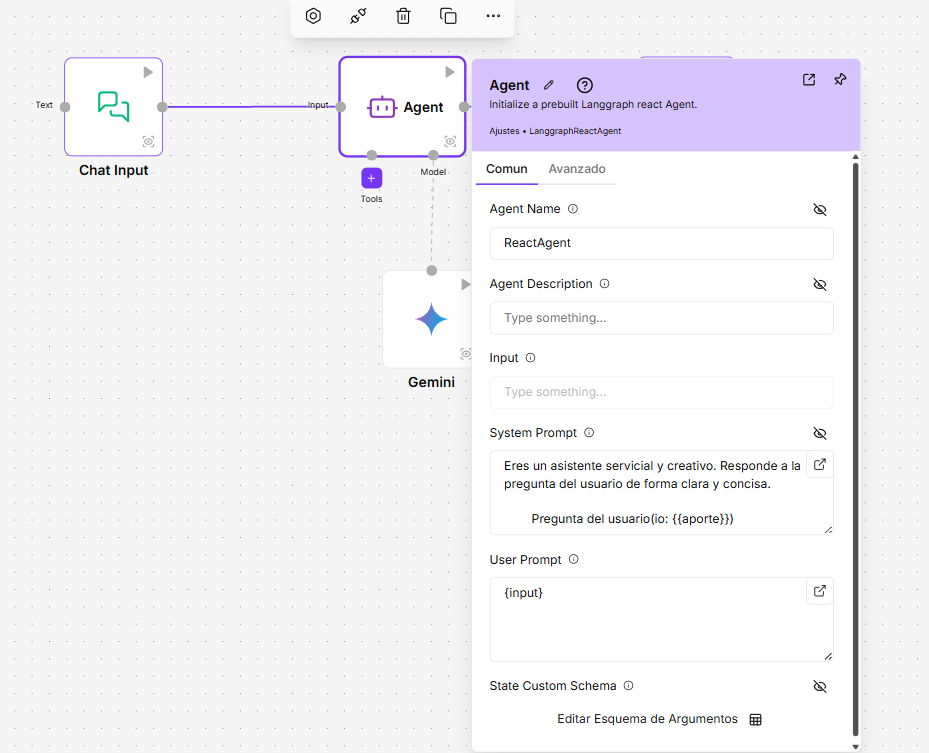
- Agent Name: You can give it a descriptive name, like
-
Chat Output: Also needs no configuration.
Step 5: Test Your Chatbot!
You’ve reached the end! It’s time to see your creation in action.
On the right side of the screen, you will see the Testing Environment which has a bug icon. 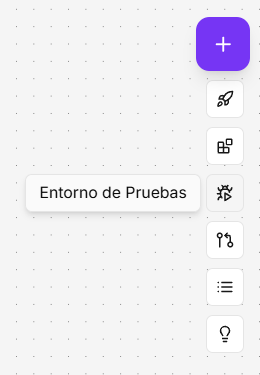
Press it to open the testing space.
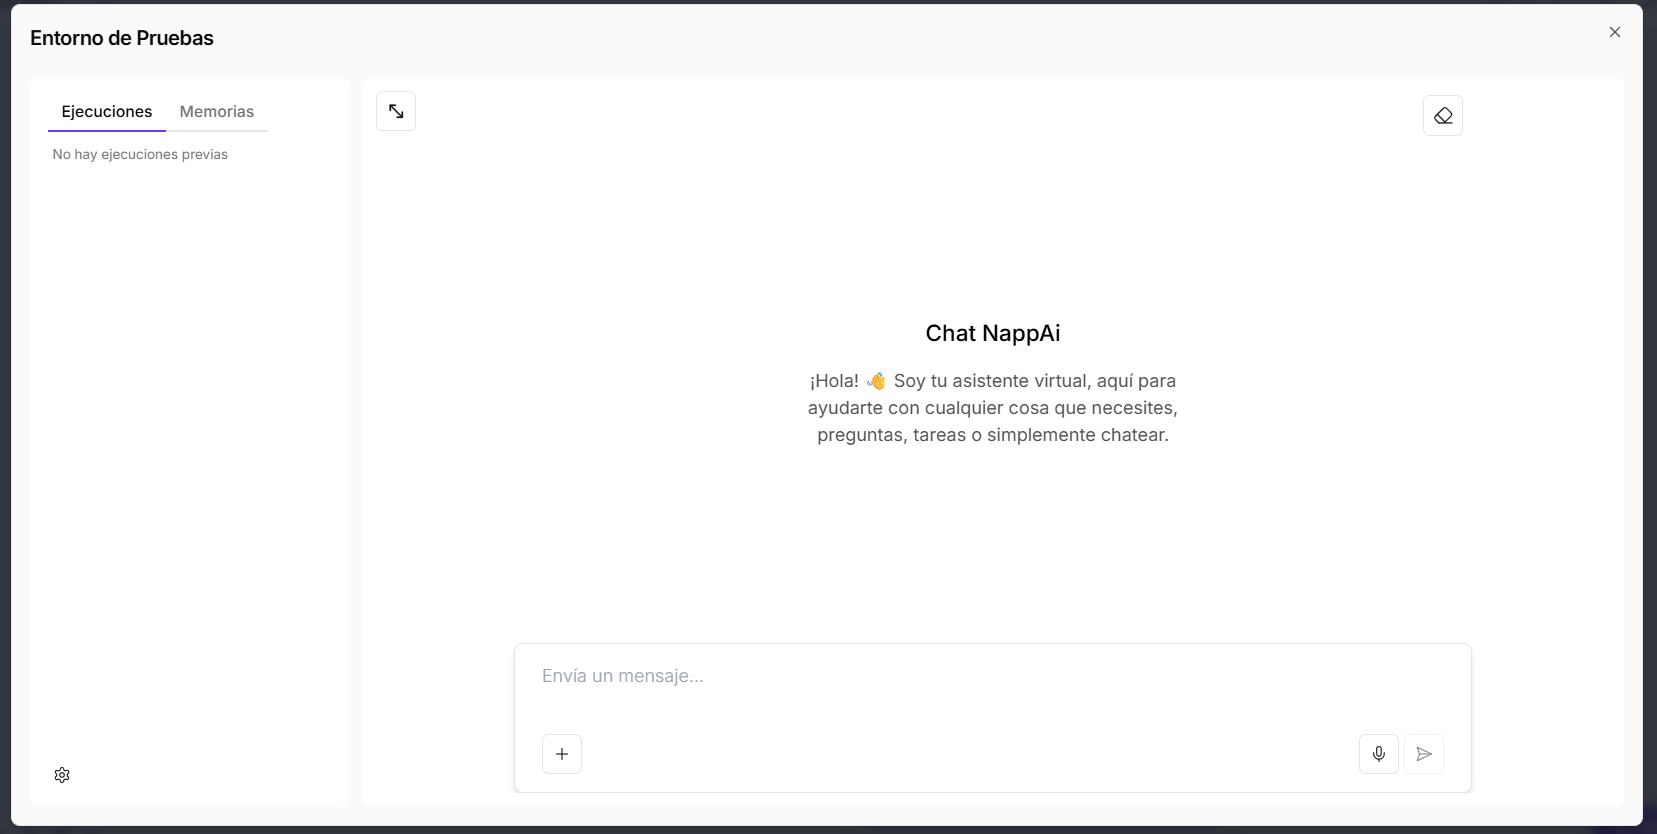 Type a question in the text field and press Enter. In a few seconds, the AI will respond.
Congratulations! You have built and tested your first AI workflow in NappAI.
What’s Next?
You’ve mastered the basics. Why not try something more?
- Video Courses - Join the lesson space here.
- Key Concepts - Understand NappAI’s fundamental building blocks.
- Navigating the Interface - Learn how to navigate the NappAI UI.